超聲波清洗機(jī)的標(biāo)準(zhǔn)操作以及規(guī)程
瀏覽: 發(fā)布日期:2019-08-29
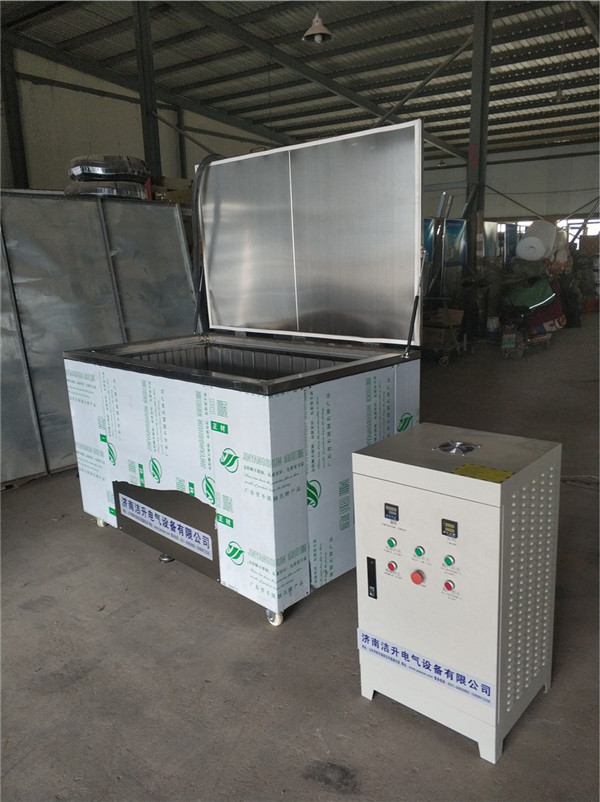
超聲波清洗機(jī)的標(biāo)準(zhǔn)操作以及規(guī)程_濟(jì)南潔升超聲波清洗機(jī)
目 的:樹立SK5200LH型超聲波清潔器標(biāo)準(zhǔn)操作規(guī)程。
范 圍:適用于SK5200LH型超聲波清潔器。 責(zé)任人:整體檢驗(yàn)員。 內(nèi) 容:
1 超聲波清潔器運(yùn)用辦法
1.1 保證作業(yè)用電源為220V 50KHZ 。 1.2清潔辦法
1.2.1直接清潔 在清潔器槽內(nèi)放置托架、水和清潔液,把被洗物件放在托架上,也可用吊架把被洗物件懸吊起來,并浸入到清潔液中。清潔槽內(nèi)禁止直接放入酒精、丙酮、汽油等易燃溶液以及強(qiáng)酸、強(qiáng)堿等腐蝕性溶液。假如必需運(yùn)用上述溶液,主張運(yùn)用直接清潔法。
1.2.2直接清潔 放水和The cleaning solution is placed in a cleaning tank, and a tray is placed to pour the desired chemical cleaning agent into a beaker or other suitable container, and the laundry is immersed therebetween. The container containing the chemical cleaner and the laundry is then immersed in the bracket in the tank.
1.3 According to the work object placed in the tank, adjust the liquid level to ensure that the liquid level ** \u0026ldquo ^ fen ^ advocate water level line \u0026 rdquo ^ fen ^. 1.4 Plug in the power supply and adjust the punctuality at the right moment. Because the cleaning target is different, the cleaning time is also very different. Most of the objects are usually cleaned for a few minutes, and some objects may need to be longer. Detailed moments can be determined by experiment.
1.5 Turn the switch off and wait 2-5 minutes for the cleaner solution to degas. The degassing process only needs to be done before cleaning or after replacing the solution every day.
1.6 After cleaning, rinse with water if necessary. 2 SK5200LHC Ultrasonic Cleaner Panel Operation Method
2.1 Standby Plug in the 220V power supply, you can hear a beep, appear on the screen, the instrument is in standby.
2.2 Power On Press the power button once. After hearing the beep, the instrument enters the working condition to be set, the background light of the display screen lights up, and the parameters in the menu bar show the factory setting values. If you do not need to set the operation status from scratch, just press the \u0026ldquo;Ultrasound\u0026rdquo; button to start the ultrasound operation.
Press the power button once in the boot condition, the instrument is turned off, and it is in standby mode. 2.3 \u0026ldquo;Switch \u0026rdquo; key is used to select the target to be set.
2.4 Press the \u0026ldquo; conditioning \u0026rdquo; key to adjust the required operating frequency, punctual time, power and set temperature. 2.5 In the boot condition, press the \u0026ldquo;Ultrasound\u0026rdquo; button to turn on the ultrasound or close the ultrasound. When the instrument starts the ultrasonic operation, the punctual time starts with the countdown of the unit of ldquo; and rdquo;, ??and the ** appears ld^;OO\u0026rdquo;. The punctual time is used up, the ultrasonic operation is completed, and the buzzer sounds 6 prompts. 2.6Setting operation
The operating frequency, punctual time, and ultrasonic power can be set in the operation status to be set. After the \u0026ldquo;Set\u0026rdquo; key selects the target to be set in the menu bar, when a target parameter is selected, the parameter will shine. At this time, the parameter can be set by the up and down keys.
Each press \u0026ldquo; switch \u0026rdquo; key once, the order of shine is: operating frequency punctual time power 2.6. 1Set the operating frequency
Two gears for selection of operating frequencies: 59KHz or 40KHz. Press the toggle button ** the number in the operating frequency column will shine. Press the up and down keys to select the desired job frequency.
2.6.2 Setting the punctual time of the ultrasonic operation
Press the toggle button ** the number in the time bar shines. Press the up and down keys to set the required working time. Each time you press it, add or cut 1 minute at any time. The adjustable scale is 1-199 minutes bidirectional cycle. Continue to press the button for more than 2 seconds, the digital display will be quickly added or decremented.
2.6.3 Setting Ultrasound Power
The ultrasonic power can be set within the set size of **40-100% of high power. Press the toggle button** the number in the power bar will shine. Press the up and down keys to adjust the ultrasonic power of the demand (each time, the power is added or reduced by 1%. Continue to press the button for more than 2 seconds, the digital display will be quickly added or decremented).
2.7 If you want to change the settings halfway, just press \u0026ldquo;Switch\u0026rdquo; to repeat the corresponding setting operation. 2.8 The instrument has a memory function, recalls the final setting, and becomes the job setting at the next boot.
3 Notes
3.1 Unplug the power cord before pouring or pouring out the solution.
3注意事項(xiàng)
3.2 Do not use alcohol, gasoline or other flammable solutions to avoid blasting or fire; do not use corrosive solutions such as strong acids and alkalis to avoid corrosion and damage to the cleaning tank.
3.1在倒入或倒出溶液之前應(yīng)拔去電源插頭。
3.3 Do not let the temperature of the cleaning solution exceed 70 °C. 3.4 If there is no cleaning solution in the tank, the machine cannot be started.
3.2不要運(yùn)用酒精、汽油或別的易燃溶液,避免導(dǎo)致爆破或火災(zāi);不要運(yùn)用各種強(qiáng)酸、強(qiáng)堿等腐蝕性溶液,避免腐蝕損壞清潔槽。
3.5 Do not place the objects directly on the bottom of the cleaning tank. They should be hung or placed on the bracket, otherwise the transducer will be damaged.
3.3不要讓清潔溶液的溫度超越70℃。 3.4槽內(nèi)無清潔溶液的情況下不能開機(jī)作業(yè)。
3.6 超聲波清洗機(jī)報(bào)價(jià)Timed replacement of cleaning solution ■
3.5不要把被洗物直接放在清潔槽底部,應(yīng)把它們懸掛起來或放在托架上,否則回?fù)p壞換能器。